One of the few American franchises I cannot get enough of is Cinnabon. They sell cinnamon buns, that's it. They have 2 sizes and with or without pecans, plus coffee. Their cinnamon buns are so good that's all they need to sell. They are just amazing. Their secret is that the dough is cookied perfectly, not raw, but not dry. American cinnamon buns use yeast to rise, whereas most Icelandic cinnamon buns (Kanil Snuður) use baking soda, and are much dryer and harder. The cinnamon layer also uses less butter so ends up more of a cinnamon powder, whereas the American style is to leave a cinnamon syrup that remains gooey even after it cools. This recipe is amazing, and I actually like it more than Cinnabon, since I don't like the cream cheese icing the use, so I can leave it off.
Part of this recipe's secret is to use all warm ingredients. One way to bring your eggs to room temperature is to put them in warm water for 10 minutes. I start by doing this.
Next I measure the butter and milk.
Melt the butter first on low heat, and as soon as it's all melted,
I add the milk, and heat it only long enough to become warm. I do not want this mixture to be hot, or it will kill the yeast.
Next comes the flour! Bread flour is better for this, as the extra gluten will form longer chains and rise fluffier, but all purpose flour is fine.
Almost five full cups of it!
Yeast, salt, and sugar.
Now the warm milk and butter and room temperature eggs.
I love having a bread machine. It has a dough setting, which takes care of the mixing, and makes it the perfect temperature for the dough to rise, and even beeps when done. If I didn't have a bread machine, I would have heated the milk separately from the butter, and dissolved the yeast into it, then mixed all the other ingredients together, and sit in a covered bowl for one hour in a warm place.
Machine has started to mix.
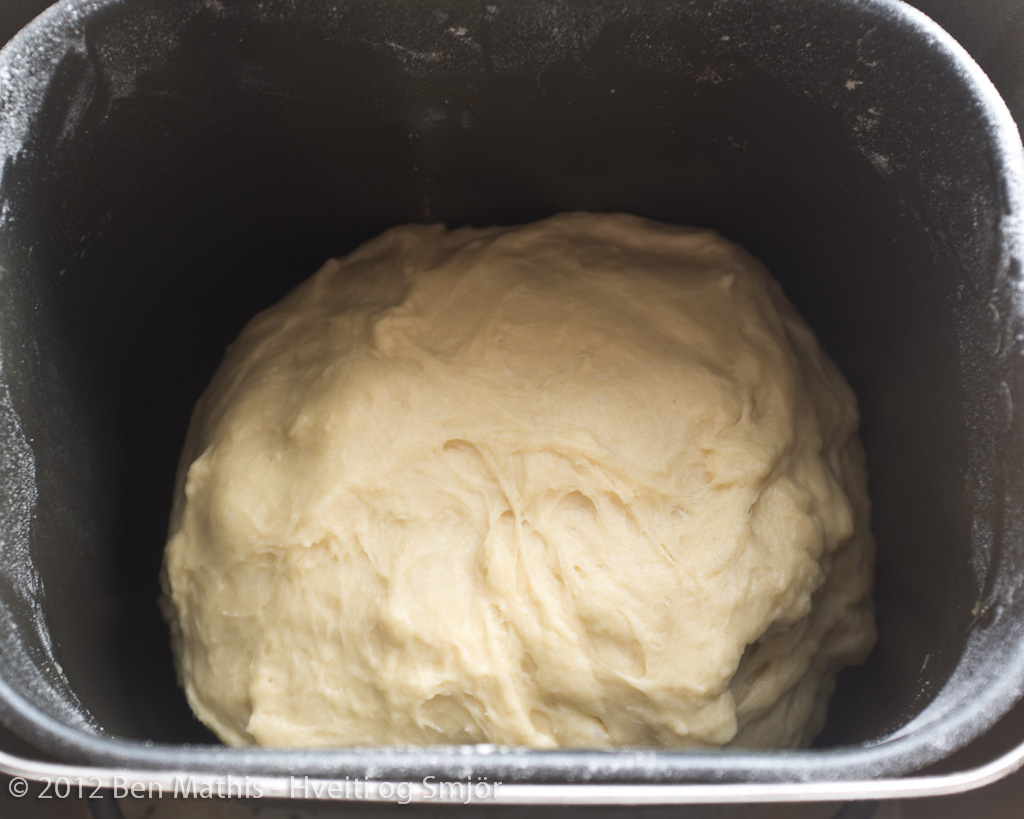
Here it is all combined before the rising period.
Huge! after rising. :-)
Now to prepare the filling ingredients. Melted butter.
Brown sugar with cinnamon, lots of cinnamon.
Here is the risen dough after a little of the air was pounded out.
Yeasted dough works best to be rolled out in two stages. Do an initial rolling out with a rolling pin, and then lift it up, so nothing is sticking, and let it sit for 5 minutes. Then roll it out the rest of the way.
The dough in the proper dimensions, my butter and cinnamon mixture all layed out.
Butter first.
Brush on evenly.
Sprinkle on the cinnamon and brown sugar mixture evenly.
Roll up the dough.
I want twelve sections, so first I mark in the middle with a knife, then divide both halves in half.
Then I mark two slices between each of those first three.
Slice the roll, best to use a serrated knife, as you don't want to squish the roll flat.
Here they are laid out in an oiled glass dish. Now I cover and let rise for another 45 minutes.
After rising.
See how the edges are now puffy and rounded, whereas in the freshly cut photo they are perfectly flat and squared off?
After baking.
Closeup for texture.
They are of course best while still warm. They deflate a little after cooling, but are still delicious and can be rewarmed in a toaster oven.
I love these so much. :-D