Saturday, March 31, 2012

Week22: Peanut Butter Chocolate Chip Oatmeal Cookies


Peanut Butter Oatmeal Cookies with Chocolate chips. :-) mmmmm
This was not my original recipe though, I tried a different experiment first. 


Originally I was going to make white chocolate brownies with raspberry swirl. It didn't come out the way I wanted, so I went with another recipe. The middle 50% was very tasty, but the outside portions rose a bit much and became too cake like, but in a dry dense way. I think I will experiment with using half as much rising agents and more white chocolate next time. I'll show you the process anyway, and then! The actual cookies I ended up making. 


White chocolate and a raspberry mash with a bit of sugar. Got me all excited for this recipe.


White chocolate is very delicate. Too hot and it falls apart. This is why I like using a double boiler. I still had to watch it, so next time I would have melted the butter first, then added the white chocolate and stirred till just melted.


Almost there.


Liquid!


Skipped a few steps here, but I added some flour, eggs, and rising agent.


Add the raspberry mash.


Marbleize.


And bake. Brownies are always difficult because you want to ensure the center isn't raw, but that the sides are not overbaked. I could have kept the edges tastier by taking them out earlier, but the center would have been a gooey mess.


Here you can see a bit of the texture, how the edge is a bit higher with some air pockets from the rising agent, whereas the center is a bit more firm.


You can see the firm center on the chunk on the fork in this one. This portion was absolutely divine. It was the edges that weren't as good.


So instead I moved to an amazing peanut butter based recipe. Starts with butter and peanut butter.


Stir while it's melting.


Till smooth and homogeneous.


All good cookie dough recipes have both white and brown sugar in them. You can adjust the dough taste by varying the ratio.


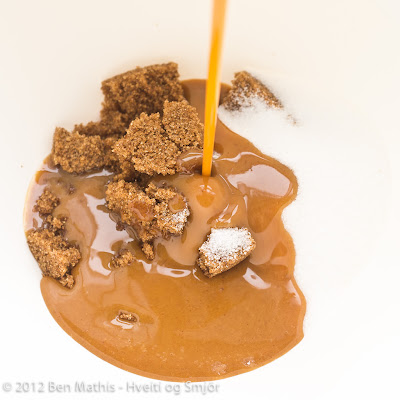
Pour over the melted butter and peanut butter mixture.


I loved how this looks, so I took a few shots of it pouring.


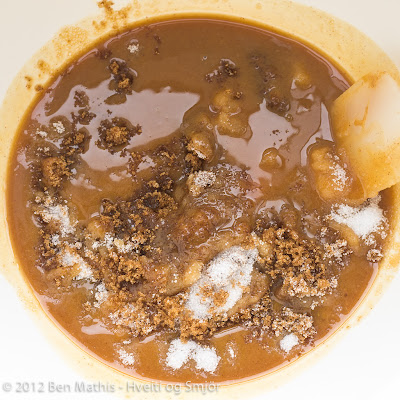
Mix it all together.


Till smooth.


Once the mixture is no longer hot, add the eggs. Some recipes call for a certain number of whole eggs, plus just egg yolks or egg whites. Egg whites lend structure and "toughen" the dough, whereas yolks add flavor and soften the dough. This particular cookie, having flour and sugar and oats, would tend to be tougher and dry, so adding an extra yolk helps combat this.


Once in the bowl it's hard to tell, but this is just one egg white, but two egg yolks.


Beat till smooth and fluffy.


Add the dry ingredients, oats, flour, and rising agents.


Mix till combined. At this point the dough could be rolled out and baked to make really delicious peanut butter oatmeal cookies, but I wanted some chocolate in it. I didn't know what type yet, so time for a taste test.


I put white chocolate in a small bit of dough, and dark chocolate. The white chocolate was nice, but the dark chocolate was so much better.


So dark chocolate it is!


Roll it out to the right thickness and cut. I much prefer cookies made with a cutter, because you can ensure uniform thickness. It takes longer, but the texture of the final cookie is far superior to the dropped ball method.


Laid out on the sheet before baking.


I'm missing a shot of them finished baking, but they were amazingly delicious, so I will be making more and will update this post with photos of the finished cookie when I do.

Wednesday, March 14, 2012

Week21: Dulce de Leche Blondies


Mmmm, I actually like blondies more than brownies. Blondies resemble brownies, they have a similar texture, weight, and shape, but their flavor comes from brown sugar, not chocolate. That's why they are light, or "blond" in color. Dulce de Leche is sort of like a caramel made from milk. It's from Argentina and means literally Milk Sweetness, or Milk Jam, the way Dulce de Frutilla means strawberry jam. So, combine the two! yes please. 


Dulce de Leche is really simple. You only need whole milk, sugar, a vanilla bean, and some baking soda.


The vanilla bean is split and the seeds scraped. I then put the wad of seeds in the sugar and use my fingers and the sugar to grind the seeds a bit so they fall apart from one clump into several.


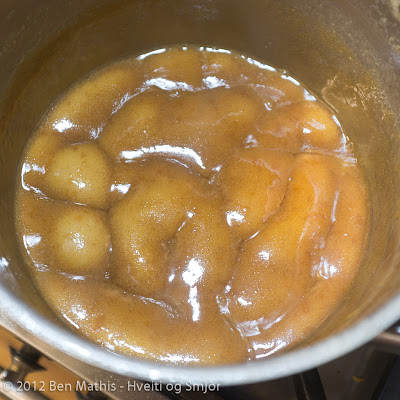
Now all ingredients are combined and boiled violently on high heat, but with constant stirring with a whisk. I keep the bean in for the first few minutes to extract extra flavor, then fish it out.


The baking soda causes the milk to foam quite a bit. The more you whisk, the more if foams. It can go up and over if you aren't careful.


The color will start to change as the sugar caramelizes.


More and darker. You can basically stop whenever you want, but it will be quite runny at these early stages. The easiest way to test, is to keep a plate in the fridge, along with a spoon. Take the spoon out and dip some sauce on it, and place it on the plate in the fridge, smearing it around a bit. The sauce will cool quickly and you can see how viscous it will be. This is necessary because when hot it's much runnier than when it cools and solidifies a bit.


Getting close. I wanted an almost gel like Dulce de Leche so I took it even further.


Mmmm, that's the ticket!  The milk is what separates this from caramel. It has a very rich creamy flavor whereas caramel is a sweeter more smooth texture.


Once cooled, it has a very nice solid gel like texture. It is not runny at all.


The blondie starts with brown sugar and butter.


Melted so it starts to caramelize just a tad, for a butterscotch like flavor.


I apologize as my camera ran out of batteries, so I only had enough to take some final photos before the batter went in the oven. The batter is the brown sugar and butter mixture from earlier, with flour, eggs, cinnamon, and baking powder. I poured a small amount in the container, than dabbed in a few dollops of Dulce de Leche, then covered it with more batter. Finally I marbleized more of the sauce on the top. 


Into the oven!


The smell of this when it came out was just heavily. Vanilla and cinnamon and warm gooey smell.


It cuts very neatly into heavy dense squares. It weighs about a kilo!


Here you can see a chunk of the dulce de leche inside the blondie. Absolutely amazing, the taste is mindblowing. :-)

Wednesday, March 7, 2012

Week20: Banana Custard Pie with Peanut Butter Icing


Week 20 is bananas! But it was a journey to make it here. The final recipe is a flaky soft crust with peanut bits inside, a banana custard center, and fluffy peanut butter icing on top!


Before the final recipe was chosen, I tried this one. It's a chocolate, banana, and peanut butter frozen pie. It's delicious, but barely firm after freezing over night, so no way I could transport it to 25+ people by bicycle. I'll show you how I made it though!


The crust is the same for both desserts. It was so tasty I kept it for the banana custard pie. It starts with salted roasted peanuts, flour, sugar and a bit of baking powder.


An egg yolk.


Oil, vanilla extract, and lemon juice. Lemon juice (or sometimes a vinegar) are used in pie crusts to keep the gluten chains short, for a flakier crust. If I had left this out, the crust would have been rubbery and hard to cut through easily with a fork.


All the liquid ingredients together for easy pouring.


First I pulse the dry ingredients till the peanuts are well chopped and mixed throughout. If you taste this powder, it's slightly sweet with a nice hint of nut taste.


Pour in the liquid till it all comes together.


Mmmm, look at that beautiful dough and it's light brown color, all from the peanuts.


Rolled out into a disc.


A closeup of the unbaked dough to show the little bits of peanuts.


I baked the extra in pseudo "breadsticks" so I could see the texture and taste before adding the pie filling. See how broken it has a flaky texture? That's from the lemon juice.


Bananas! I haven't made an item with these yet, and their time has finally come. See how they are starting to brown? This means the fruit has started to oxidize. They are softer, and sweeter when brown like this. Perfect for baking, even if the texture is a bit too soft for most people's raw eating pleasure.


Just right. Only a few dark spots, but the fruit is easily mashed.


Add peanut butter.


And coconut milk! I love coconut milk, it's so creamy and tasty. It adds a richness to recipes that milk cannot.


Bananas, peanut butter, coconut milk, a bit of cocoa powder, and vanilla extract. That's it! This is pureed till ultra smooth with no lumps from the bananas, and poured into the pie crust, and needs freezing for at least 3 hours.


It was tasty, and I was able to slice it, but you can see from this photo, that even straight out of the freezer it's a bit soft. So, on to the next recipe. I knew I wanted to keep the crust, and the bananas, and the coconut milk. Most people would immediately jump to a banana cream pie, but those are also needing to be cold to set, and I wanted something baked. A baked banana pie! Yes!


I needed more bananas.


These were soft enough I didn't even need to tear them into chunks. I just started the mixer for a minute and got a nice banana pure.


Add coconut flakes.


Add some brown sugar and flour.


Mmmm, coconut milk. I normally don't include packaging in the shots, but I loved the drip and the easy to read label with no distracting brand or logo.


Here is the custard batter before baking. Bananas, coconut flakes, brown sugar, melted butter, vanilla extract, and coconut milk. Yummy!


Another peanut crust.


Mmmm, look at those golden edges.


A little under an hour later, out comes a beautiful light gold pie.


Next the icing. This is just room temperature butter and peanut butter, whipped for several minutes till the color starts to lighten and it is well incorporated. You can see the darker brown of the plain peanut butter still stuck to the walls.


After it's well fluffed, powdered sugar is added to sweeten a bit, and to help it be able to dry into a stiff icing like texture.


Finally a little cream is added to get it slightly more spreadable.


Baked, cooled, iced, and on display!


Check out the texture. Flaky brown crust bottom, smooth custard banana center, and rich, sweet, nutty icing top.


Mmmmm


I think I'll go have another slice. :-)